🚴 Introduction
Cycling is one of the fastest-growing hobbies and commuting options in 2025. It’s eco-friendly, keeps you fit, and saves money on fuel. But nothing is more frustrating than having your bike break down mid-ride. A flat tire, squeaky brakes, or a slipped chain can stop your journey instantly.
The good news? You don’t need to rush to the mechanic every time something goes wrong. With this DIY cycle repair guide, you’ll learn how to fix your bike like a pro—right from your garage or even on the roadside. Whether you’re a beginner or an experienced rider, this step-by-step guide will save you money, build confidence, and keep your rides smooth.
Table of Contents
🔧 Why Learn DIY Bike Repairs?
Still thinking if DIY bike repairs are worth learning? Here are the top reasons:
- Save Money: A professional bike service can cost $30–$100 per visit. Doing it yourself reduces long-term costs.
- Convenience: Fix your bike anytime—whether at home or during a roadside emergency.
- Confidence: Knowing you can handle breakdowns makes long rides less stressful.
- Skill Building: The more you practice, the better you become at diagnosing and solving mechanical issues.
- Independence: You won’t have to wait days for a shop appointment.
🧰 Essential Tools for Bike Repair
Before you begin your DIY journey, invest in some basic tools. These don’t have to be expensive—most are affordable and last for years.
Must-Have Tools:
- Tire levers: For removing tires without damaging rims.
- Patch kit + spare tube: To fix punctures.
- Portable pump or CO₂ inflator: For inflating tires on the go.
- Multi-tool: Includes Allen keys, screwdrivers, and sometimes a chain breaker.
- Chain tool: For fixing broken chains.
- Screwdrivers & wrench: For brake and gear adjustments.
- Lubricant (chain lube): Keeps drivetrain smooth.
- Cleaning brushes & cloth: For regular cleaning.
- Torque wrench (optional): Ensures bolts are tightened correctly.
👉 Pro Tip: Keep a small portable repair kit with you on every ride. It can save your day.
🔨 Step-by-Step DIY Bike Repair Tutorials
Here’s where the real fun begins. Let’s go through the most common bike problems and their fixes.
1. Fixing a Flat Tire
A flat tire is the #1 issue cyclists face. Luckily, it’s also the easiest to fix.
Steps:
- Shift your bike into the smallest gear (rear).
- Remove the wheel from the bike.
- Grab your tire levers to lift the tire away from the rim.
- Take out the inner tube and locate the puncture.
- If small, patch it; if badly torn, replace with a new tube.
- Check inside of tire for sharp objects.
- Insert tube, refit tire, and inflate.
Pro Tip: Always carry a spare tube—it’s faster than patching on the road.
2. Repairing a Broken Chain
A broken chain might look scary, but it’s manageable.
Steps:
- Use a chain tool to remove the damaged link.
- Insert a quick link (master link) or push the pin back in.
- Recheck by pedaling slowly—chain should run smoothly.
Why It Matters: A faulty chain can damage gears and derailleur.
3. Adjusting Brakes
Good brakes = safe rides. Over time, brake pads wear down and cables stretch.
For Rim Brakes:
- Check if pads align with rims.
- Adjust cable tension using the barrel adjuster.
- Replace pads if thin.
For Disc Brakes:
- Loosen caliper bolts, squeeze brake lever, and re-tighten.
- If rotor rubs, make fine adjustments.
4. Tuning Gears
Slipping gears or noisy shifting is frustrating.
Steps:
- Shift through all gears while pedaling.
- Adjust derailleur limit screws (H & L) to align correctly.
- Fine-tune using barrel adjuster.
👉 Pro Tip: Keep derailleur clean and lubricated for smooth shifting.
5. Wheel Truing (Straightening a Wheel)
If your wheel wobbles, it needs truing.
Steps:
- Spin wheel and watch where it rubs against brake pads.
- Use a spoke wrench to tighten or loosen spokes at that point.
- Make small adjustments—1/4 turn at a time.
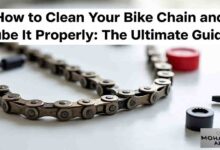
6. Lubricating Your Bike
A noisy chain is a sign of poor lubrication.
Steps:
- Clean chain with rag/brush.
- Apply one drop of lube per link.
- Wipe excess lube—too much attracts dirt.
7. Replacing Brake Pads
Steps:
- Unscrew old pads.
- Slide in new pads.
- Check alignment before tightening.
- Test brakes before riding.
8. Tightening Loose Bolts & Screws
Loose bolts on handlebars, seat, or pedals can be dangerous.
- Use Allen keys or torque wrench to tighten.
- Never overtighten—follow manufacturer’s torque settings.
📝 Regular Maintenance Checklist
To avoid big repairs, do these checks regularly:
- Clean bike weekly.
- Check tire pressure before every ride.
- Lube chain every 100–150 km.
- Inspect brake pads monthly.
- Replace cables & chains yearly (depending on use).
⚠️ Common Mistakes to Avoid
- Over-lubricating chain → attracts dirt.
- Ignoring small noises → can lead to expensive repairs.
- Using wrong size tools → strips bolts.
- Skipping regular cleaning → reduces bike life.
🔧 DIY Repairs vs Professional Bike Shop: Which is Better?
DIY Repairs
✅ Saves money
✅ Convenient
✅ Builds confidence
❌ May lack expertise for complex issues
Professional Shop Repairs
✅ Expert service
✅ Access to advanced tools
✅ Good for complex jobs (suspension, wheel builds)
❌ Expensive
❌ Waiting time
👉 Best Strategy: Learn basic DIY repairs + leave advanced jobs to pros.
🔰 Beginner vs Advanced Repairs
Beginners can handle:
- Fixing flats
- Lubing chain
- Replacing brake pads
- Adjusting seat/handlebars
Advanced cyclists can handle:
- Gear tuning
- Wheel truing
- Bottom bracket replacement
- Suspension servicing
Read Also- Essential Cycling Gear Every Rider Must Have in 2025
❓ FAQs
Q1: Can I repair my bike without special tools?
Yes, basic fixes like flats and lubrication need simple tools.
Q2: How often should I service my bike?
Basic cleaning weekly, full servicing every 6–12 months.
Q3: What’s the hardest DIY repair?
Wheel truing and gear tuning take patience and practice.
Q4: Should I use WD-40 on my bike chain?
No—it’s a cleaner, not a lubricant. Use proper chain lube.
🏆 Conclusion
Repairing your own bike doesn’t have to be complicated. With this DIY cycle repair guide, you can handle most common problems at home or even on the roadside.
Start with simple repairs like fixing flats, adjusting brakes, and lubricating chains. As you gain confidence, move on to advanced repairs. Over time, you’ll save money, ride with peace of mind, and become truly self-reliant. 🚴✨